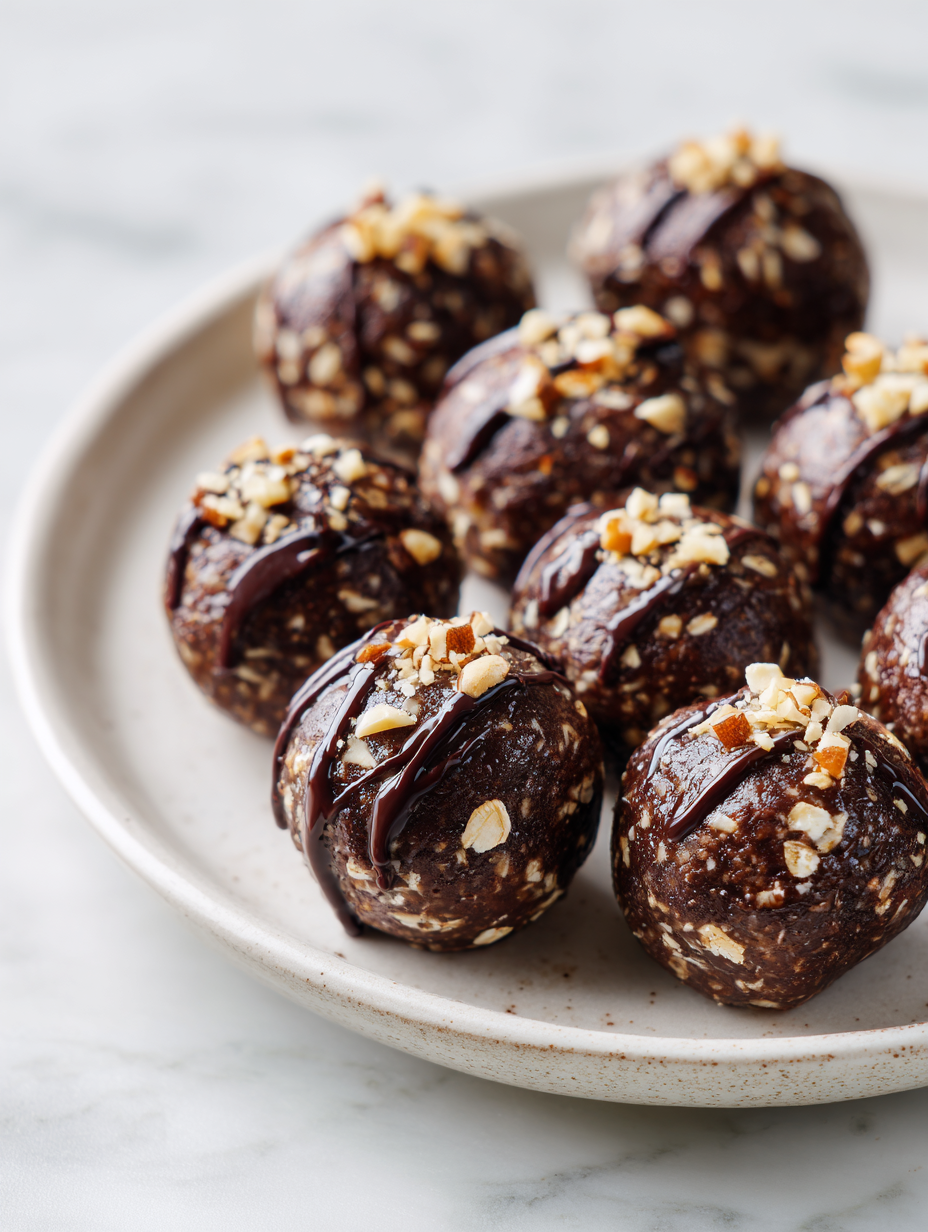
Blog

  • Spooky Delights: Halloween Bat Wings with a Soy Sauce Twist

    Spooky Delights: Halloween Bat Wings with a Soy Sauce Twist

    Imagine biting into that crispy skin of chicken wings, glazed with a glossy soy sauce coating that glistens like a dark moonlit night. This Halloween, I wanted to elevate the usual party finger food by adding a whimsical, yet slightly sinister, twist. The shape of these wings, resembling tiny bat wings, makes them not just delicious but visually captivating for any spooky gathering.

    Cooking these wings is an experiment in balancing savory, umami-rich soy sauce with a touch of sweetness and a hint of garlic. The aroma that fills your kitchen as they bake is part nostalgia, part chaos—like a busy Halloween night. It’s a perfect blend of fun and flavorful that turns an ordinary appetizer into a conversation starter.

    Halloween Bat-Shaped Soy Glazed Chicken Wings

    These chicken wings are baked until crispy and coated with a glossy soy sauce glaze, creating a savory and slightly sweet appetizer. They are shaped to resemble tiny bats, adding a fun and spooky visual element perfect for Halloween parties. The final result is crispy on the outside with tender meat inside, finished with a shiny, flavorful coating.
    Prep Time 20 minutes
    Cook Time 40 minutes
    Total Time 1 hour
    Servings: 4
    Course: Main Course
    Cuisine: American
    Calories: 320

    Ingredients
      

    • 2 pounds chicken wings split into drumettes and flats
    • 1/4 cup soy sauce for glazing
    • 2 tablespoons honey adds sweetness to the glaze
    • 3 cloves garlic minced
    • 1 teaspoon sesame oil for flavor
    • 1/2 teaspoon black pepper optional, for seasoning
    • 1 tablespoon cornstarch for thickening the glaze
    • 1 cup water to dissolve cornstarch

    Equipment

    • Baking Sheet
    • Wire rack
    • Mixing bowls
    • Kitchen brushes

    Method
     

    1. Preheat your oven to 400°F (200°C). Line a baking sheet with foil and place a wire rack on top for even cooking.
    2. Pat the chicken wings dry with paper towels to remove excess moisture, helping them crisp up during baking.
    3. Use kitchen scissors or a sharp knife to shape each wing into a bat wing silhouette—elongate the tips slightly and create small ‘ears’ for a spooky effect.
    4. Arrange the shaped wings on the wire rack, spacing them out for proper airflow. Bake for about 35-40 minutes until golden brown and crispy.
    5. Meanwhile, make the soy glaze by mixing soy sauce, honey, minced garlic, sesame oil, black pepper, water, and cornstarch in a small saucepan.
    6. Bring the mixture to a simmer over medium heat, stirring constantly until the glaze thickens and becomes glossy, about 2-3 minutes.
    7. Remove the baked wings from the oven and transfer them to a large bowl or place directly on a clean sheet of parchment paper.
    8. Brush or toss the crispy wings generously with the soy glaze, coating each piece thoroughly for a shiny, flavorful finish.
    9. Arrange the glazed wings on a serving platter, and, if desired, use additional accents like cut-out paper bats or edible decorations for a spooky presentation.
    10. Serve hot, letting the crispy, glazed wings delight both the eyes and the palate at your Halloween gathering.

    Notes

    Shaping the wings into bat shapes adds a fun visual element. Be careful not to overcrowd the baking sheet to ensure crispiness.
    As the wings cool slightly, the rich, caramelized glaze sets into a perfect crackle— promising a burst of savory delight with every bite. These bat wings aren’t just for Halloween; they’re a reminder that even the simplest ingredients can turn into something extraordinary with a little imagination.

    Enjoy these spooky bites at your next costume party or during a cozy night in October. They bring a playful yet gourmet touch to your culinary repertoire, and the crispy, sticky goodness really steals the show. This recipe proves that with a bit of flair, even a familiar favorite can feel brand new and festive.

  • Spooky Delight: The Halloween Spider Cheese Ball

    Spooky Delight: The Halloween Spider Cheese Ball

    Halloween is the perfect time to embrace the playful chaos of food artistry. This Spider Cheese Ball turns simple cheese into a spooky centerpiece that walks the line between creepy and cute. Its crumbly texture invites you to dive in, chasing the indulgent flavor as it melts on your tongue.

    Crafting this recipe offers a delightful mix of nostalgia and creative chaos, a chance to unleash your inner munchkin. The smell of sharp cheddar mingling with the earthy hint of herbs makes the kitchen a scene of excited anticipation. Plus, it’s a crowd-pleaser for both kids and adults craving a little culinary mischief.

    Spider Cheese Ball

    The Spider Cheese Ball is a savory cheese spread shaped into a rounded form and decorated to resemble a spider with web-like details. It has a crumbly yet creamy texture, with a rich cheesy flavor enhanced by herbs, making it an eye-catching appetizer. The final presentation features a spherical cheese center with spider legs and web accents crafted from edible ingredients.
    Prep Time 20 minutes
    Total Time 20 minutes
    Servings: 8
    Course: Main Course
    Cuisine: American
    Calories: 150

    Ingredients
      

    • 8 oz cream cheese, softened
    • 1 cup shredded sharp cheddar cheese
    • 2 tbsp chopped fresh herbs (parsley, chives, or thyme)
    • 1 tsp garlic powder
    • to taste Salt and pepper
    • 10 pretzel sticks or breadsticks pretzel sticks for spider legs
    • 3 black olives or peppercorns eyes for the spider
    • 2 tbsp tomato sauce or red pepper jelly for spider web decoration

    Equipment

    • Mixing bowl
    • Hand mixer or spoon
    • Plastic wrap
    • Serving platter
    • Pretzel sticks or breadsticks
    • Olives or black peppercorns

    Method
     

    1. In a mixing bowl, combine the softened cream cheese and shredded cheddar until well blended and smooth, using a spatula or hand mixer. This creates a creamy, cheesy base for your sphere.
    2. Mix in chopped herbs and garlic powder to add flavor and a touch of color, then season with salt and pepper to taste. Fold everything together until evenly incorporated.
    3. Gather the cheese mixture onto a large piece of plastic wrap and shape it into a tight ball or oval, pressing gently to firm up the shape. Wrap it tightly and refrigerate for at least 15 minutes to set.
    4. Unwrap the chilled cheese ball and place it on a serving platter. Use a spatula to smooth the surface if needed.
    5. Insert pretzel sticks into the sides of the cheese ball to form spider legs, arranging them evenly around the sides for a balanced look. Press gently so they stay embedded.
    6. Slice the olives or peppercorns in half and place two as eyes on the front of the cheese ball, positioning them to give your spider a cute face.
    7. Using a small spoon, drizzle tomato sauce or red pepper jelly across the top of the cheese ball in concentric circles or a web pattern to mimic a spider web design.
    8. If desired, add extra web details by piping additional sauce or jelly for more intricate web patterns.
    9. Arrange the completed spider cheese ball on a platter, place the pretzel legs outward, and ensure eyes are visible for a playful, spooky effect.
    10. Serve immediately with additional pretzels, crackers, or vegetables for dipping, or refrigerate until ready to enjoy.

    Notes

    For a more textured look, lightly crush some nuts or herbs and sprinkle on top before serving.

    This Halloween treat isn’t just about aesthetics. It’s a fun way to bring friends together around the table, sharing laughs and spooky bites. When the day winds down, this cheese ball remains a conversation starter and a reminder of how playful cooking can be.

    So gather your ingredients and let your imagination run wild. This Spider Cheese Ball is sure to become a memorable part of your spooky celebrations—messy, joyful, and delicious to the last bite.

  • Chill Out with a Chocolate Slushie: A Summertime Escape

    Chill Out with a Chocolate Slushie: A Summertime Escape

    On those scorching afternoons, I find myself craving a cool retreat that satisfies both my sweet tooth and my need for something frosty. Enter the chocolate slushie — a mysterious blend of icy simplicity and rich cocoa flavor that transforms a mundane day into a mini celebration. It’s like a cold hug, but in a glass, with a splash of chaos from the blender’s whirr.

    This recipe isn’t just about beating the heat; it’s about rediscovering childhood nostalgia with a adult twist of intense chocolate. The creamy texture, combined with the crunch of ice and the aroma of cocoa, makes every sip a little moment of bliss. Plus, it’s remarkably quick to whip up, leaving you more time to enjoy the sunshine or lazy poolside lounging.

    Chocolate Slushie

    The chocolate slushie is a chilled beverage made by blending ice with cocoa powder and sweeteners until smooth and icy. It has a creamy texture with a rich chocolate flavor, resembling a frozen, silky drink that’s both refreshing and indulgent. The final appearance is a thick, frosty pourable mixture with a velvety surface.
    Prep Time 5 minutes
    Total Time 5 minutes
    Servings: 2
    Course: Main Course
    Cuisine: American
    Calories: 150

    Ingredients
      

    • 2 cups ice cubes preferably crushed or small cubes for easier blending
    • 3 tablespoons unsweetened cocoa powder for rich chocolate flavor
    • 3 tablespoons granulated sugar adjust to taste or substitute with honey or syrup
    • 1 cup milk dairy or plant-based
    • 1 teaspoon vanilla extract optional but adds depth

    Equipment

    • Blender
    • Measuring cups and spoons

    Method
     

    1. Add the ice cubes to your blender. Make sure they are evenly distributed for smooth blending.

    Notes

    For an extra indulgence, top with whipped cream or chocolate shavings.

    As the summer buzzes outside my window, this chocolate slushie feels like a quiet rebellion against the sweltering heat. It’s a treat you can customize endlessly — add a sprinkle of sea salt or a swirl of caramel for an unexpected delight. The simple joy of cold, chocolaty goodness is what makes this recipe a staple in my home every warm season.

    Whether you’re hostings friends or just in need of a sweet escape, this slushie is your perfect companion. Its versatility and quick prep make it a reliable choice for any occasion. Sometimes, all it takes is a single icy sip to brighten even the gloomiest summer day.

  • Spiced Pumpkin Muffins with a Twist: A Cozy Fall Favorite

    Spiced Pumpkin Muffins with a Twist: A Cozy Fall Favorite

    As the leaves turn and the air cools, I find myself craving the comforting aroma of pumpkin baked goods. But this recipe isn’t your typical pumpkin muffin; it features a secret sprinkle of chai spices that transforms it into a warm, spicy hug. The minute these muffins come out of the oven, the scent alone beckons everyone into the kitchen.

    This twist on pumpkin muffins captures the nostalgic essence of fall while adding a burst of unexpected flavor. They’re perfect for spontaneous mornings or when you need a little seasonal magic in your day. Plus, they’re so simple to whip up with pantry staples, making every bake feel like a small celebration.

    Pumpkin Chai-Spiced Muffins

    These muffins are made by mixing pumpkin puree with dry and wet ingredients, then adding a blend of chai spices. They are baked until golden and have a moist, tender crumb with a slightly domed top, accented by warm spices and a spicy aroma. The final appearance is a batch of neatly risen, fragrant muffins ready to enjoy.
    Prep Time 15 minutes
    Cook Time 20 minutes
    Total Time 35 minutes
    Servings: 12
    Course: Main Course
    Cuisine: American
    Calories: 210

    Ingredients
      

    • 1 1/2 cups all-purpose flour sifted
    • 1/2 cup granulated sugar
    • 1 teaspoon baking soda
    • 1/2 teaspoon salt
    • 2 teaspoons chai spice blend or pumpkin pie spice, a mix of cinnamon, ginger, cardamom, cloves
    • 3/4 cup pumpkin puree unsweetened
    • 1/3 cup vegetable oil
    • 2 large eggs
    • 1 teaspoon vanilla extract

    Equipment

    • Mixing bowls
    • Whisk
    • Muffin tin
    • Paper or silicone muffin liners
    • Cooling rack

    Method
     

    1. Preheat the oven to 375°F (190°C) and line a muffin tin with paper liner or lightly grease it.
    2. In a large mixing bowl, whisk together the sifted flour, sugar, baking soda, salt, and chai spice blend until evenly combined. This ensures the spices are evenly dispersed throughout the dry ingredients.
    3. Add the pumpkin puree, vegetable oil, eggs, and vanilla extract to a separate bowl. Whisk until the mixture is smooth, slightly thickened, and starts to get glossy, about 30 seconds.
    4. Pour the wet mixture into the dry ingredients. Gently fold the batter together with a spatula until just combined; do not overmix, as this can make the muffins dense.
    5. Divide the batter evenly among the muffin cups, filling each about 2/3 full. The batter will be thick but scoopable.
    6. Bake in the preheated oven for 18-20 minutes, or until the muffins are golden and a toothpick inserted into the center comes out clean. Fill the kitchen with a warm, spicy aroma as they bake.
    7. Remove the muffins from the oven and place on a cooling rack. Let them cool for at least 10 minutes to firm up before serving.
    8. Enjoy these soft, moist muffins with a warm cup of tea or coffee, basking in their comforting fall flavors and fragrant spice aroma.

    These pumpkin muffins are more than just a seasonal treat; they’re a reminder of cozy mornings and those fleeting fall afternoons. Sharing them with loved ones makes the season feel a bit more special, with every bite bringing a swirl of warmth and spice. Whether enjoyed with a cup of coffee or as a quick snack, they’re sure to become a fall staple.

    There’s something satisfying about transforming humble ingredients into something that feels like a little piece of seasonal cheer. Keep this recipe handy for those crisp mornings or lazy weekend brunches. It’s a simple pleasure that never loses its comforting, nostalgic charm.

  • Champagne Slushie: The Frozen Sparkle of Summer

    Champagne Slushie: The Frozen Sparkle of Summer

    As summer heats up, this Champagne Slushie is becoming my go-to drink. It’s a nostalgic nod to childhood frozen treats, but with a chic adult twist. Pouring it into a glass, I love how the bubbles shimmer through the icy haze, promising a taste that’s both crisp and velvety. It’s the sort of refreshment that makes you pause and smile at the simple joys of life.

    Champagne Slushie

    A Champagne Slushie is a frozen cocktail combining bubbly champagne with sweet syrup and citrus flavors, blended until smooth and icy. The final texture is velvety and icy, with sparkling bubbles shimmering through the blend, creating a refreshing beverage with a frosty appearance.
    Prep Time 10 minutes
    Total Time 10 minutes
    Servings: 4
    Course: Main Course
    Cuisine: fusion
    Calories: 150

    Ingredients
      

    • 1 bottle champagne chilled
    • 1/2 cup simple syrup or honey syrup
    • 1/4 cup fresh lemon juice or lime juice
    • 2 cups ice cubes

    Equipment

    • Freezer
    • Blender
    • Measuring cup

    Method
     

    1. Pour the chilled champagne into a measuring cup to make it easier to blend later.
    2. Add the simple syrup and fresh lemon juice to the champagne, stirring gently to combine and balance the sweetness with a tangy note.
    3. Transfer the mixture to a freezer-safe container and freeze for about 2 hours, until it is thoroughly chilled and slightly slushy.
    4. Place the ice cubes in a blender and add the frozen champagne mixture on top.
    5. Pulse the blender until all ice is broken down and the mixture becomes smooth, velvety, and icy in texture.
    6. Pour the slushie into chilled glasses, allowing the fizzy bubbles to shimmer through the icy blend.
    7. Garnish with a lemon twist or a sprig of fresh mint if desired and serve immediately for the freshest, frosty experience.

    So when the heat is relentless and the mood calls for something special, this frozen bubbly concoction comes to the rescue. It’s a reminder that sometimes the simplest ingredients can make the most memorable moments. Cheers to icy delights and endless summer days.

  • Unlikely Fall Casserole Combos That Will Surprise You

    Unlikely Fall Casserole Combos That Will Surprise You

    As the leaves turn and the air gets crisp, I started searching for cozy casseroles that break the tradition. Instead of the usual pumpkin or apple, I wanted something with a twist—think sweet potato and sausage combined with a hint of cinnamon. These casseroles aren’t just comforting; they add an unexpected depth to your fall dinners.

    This season, I’m swapping classic ingredients for unexpected allies to create dishes that spark conversation around the table. Imagine biting into a warm, cheesy layer topped with crunchy pecans and smoky sausage, all infused with fall’s warm spices. It’s a fresh take that makes even the most seasoned home chef smile at the kettle of chaos on their stove.

    Sweet Potato and Sausage Casserole with Cinnamon and Pecans

    This casserole combines roasted sweet potatoes and savory sausage, layered with melted cheese and topped with crunchy pecans. Baked until bubbly and golden, it features a warm, textured topping and a rich, flavorful filling infused with fall spices. The dish offers a comforting yet slightly unexpected twist on traditional casseroles, with a balance of creamy, chewy, and crisp textures.
    Prep Time 15 minutes
    Cook Time 45 minutes
    Total Time 1 hour
    Servings: 6
    Course: Main Course
    Cuisine: Comfort Food
    Calories: 450

    Ingredients
      

    • 2 pounds sweet potatoes peeled and cubed
    • 1 pound sweet Italian sausage casings removed
    • 1 cup shredded cheddar cheese
    • 0.5 cup chopped pecans
    • 1 teaspoon ground cinnamon plus extra for topping
    • 2 tablespoons olive oil
    • 1 medium yellow onion diced
    • 2 cloves garlic minced
    • 0.5 cup crème fraîche or sour cream
    • salt and pepper to taste

    Equipment

    • Large baking dish
    • Skillet
    • Mixing bowls
    • Knife
    • Cutting Board
    • Spatula
    • Measuring cups and spoons

    Method
     

    1. Preheat your oven to 375°F (190°C). Toss the cubed sweet potatoes with 1 tablespoon of olive oil, a pinch of salt, pepper, and a sprinkle of cinnamon. Spread them evenly on a baking sheet and roast until tender and slightly caramelized, about 25 minutes.
    2. Meanwhile, heat the remaining tablespoon of olive oil in a skillet over medium heat. Add diced onion and cook until soft and translucent, about 5 minutes. Stir in the minced garlic and cook until fragrant, about 1 minute.
    3. Add the sausage to the skillet, breaking it apart with a spatula. Cook until browned and cooked through, about 8-10 minutes. Remove from heat and set aside.
    4. In a large mixing bowl, combine the roasted sweet potatoes, cooked sausage mixture, crème fraîche, cinnamon, and half of the shredded cheese. Mix gently until evenly combined.
    5. Transfer the mixture into a greased baking dish, spreading it out into an even layer. Top generously with the remaining shredded cheese and chopped pecans. Lightly sprinkle extra cinnamon on top for added aroma.
    6. Bake the casserole in the preheated oven until the cheese is melted and bubbly, and the topping is golden brown, about 20-25 minutes.
    7. Remove from the oven and let it rest for a few minutes. Garnish with extra pecans or fresh herbs if desired. Serve hot, enjoying the combination of creamy, crispy, and savory textures.

    Notes

    Feel free to substitute with other fall nuts or add a dash of nutmeg for extra warmth.
    Fall is the perfect season to experiment with new casserole flavors. These recipes are about comfort, yes, but also about surprise and joy at the dinner table.

    Embrace the chaos of fall cooking with dishes that excite your taste buds. They’re simple, satisfying, and just fancy enough to feel like you’ve gone beyond the everyday. When the cold wind blows, let these casseroles warm your home and your heart.

  • Chill Out with a Frozen Piña Colada: A Tropical Twist for Your Brain

    Chill Out with a Frozen Piña Colada: A Tropical Twist for Your Brain

    Imagine the warm sun on your shoulders, a gentle breeze carrying the scent of ripe pineapples, and you reaching for something insanely refreshing. The piña colada slushie is more than a drink; it’s a nostalgic escape that transports you to sandy beaches, even if you’re stuck at home. Making it at home lets you control the sweetness and ice texture, turning any dull afternoon into a mini tropical vacation.

    This recipe isn’t just about blending tropical flavors; it’s about the messy joy of getting that perfect icy texture. No fancy equipment needed—just a good blender and some ripe pineapples and coconuts. It’s your easiest ticket to cooling down while feeling like you’ve escaped somewhere warm and carefree.

    ## WHY I LOVE THIS RECIPE?
    – It’s a portable mini-vacation in a glass, handy on sweltering days.
    – Nostalgic for summer beach trips, but perfect in any season.
    – It turns your kitchen into a tropical cabana with minimal effort.
    – Using fresh ingredients fills the house with delightful, sweet aromas.

    Piña Colada Slushie

    The piña colada slushie is a frozen beverage blending ripe pineapple chunks and coconut milk into a smooth, icy consistency that resembles a tropical frozen treat. It features bold fruit flavors with a creamy texture, topped with a frosty appearance perfect for sipping on hot days. This drink is made by blending fresh ingredients until thick and slushy, resulting in a refreshing and visually appealing frozen mixture.
    Prep Time 5 minutes
    Total Time 5 minutes
    Servings: 2
    Course: Main Course
    Cuisine: Tropical
    Calories: 140

    Ingredients
      

    • 2 cups ripe fresh pineapple chunks preferably frozen for texture
    • 1 cup coconut milk full-fat for creaminess
    • 2 tablespoons simple syrup adjust sweetness to taste
    • 1 cup ice cubes preferably crushed or small

    Equipment

    • Blender
    • Measuring cups and spoons

    Method
     

    1. Add the frozen pineapple chunks, coconut milk, simple syrup, and ice cubes into the blender. Secure the lid tightly.
    2. Start blending on a low setting, then increase to high, blending until the mixture is smooth, thick, and slushy, with a slight frosty appearance.
    3. Stop the blender and check the consistency; it should be creamy with a slightly icy texture that holds its shape.
    4. Pour the piña colada slushie into glasses, creating a mound with a slightly frosted surface.
    5. Optional: garnish with a pineapple slice or a maraschino cherry for a colorful touch.
    6. Serve immediately with a straw, enjoying the icy, flavorful taste of the tropical escape.

    Notes

    Use frozen pineapple for an extra thick slushie. Adjust sweetener to taste and blend until the desired icy consistency is reached.
    This piña colada slushie is my go-to treat when I want to beat the heat or just indulge in childhood flavors. It’s quick, simple, and utterly satisfying, making it a favorite for spontaneous gatherings or a solo lazy afternoon.

    Plus, it’s versatile—swap in dairy or coconut milk, add a splash of rum for an adult twist, or toss in pineapple chunks for extra texture. Whichever way you enjoy it, one thing’s for sure: this frozen delight never fails to brighten a day with its creamy, tropical charm.

  • Eggplant Parmesan Reimagined: A Savory Spin on Comfort Food

    Eggplant Parmesan Reimagined: A Savory Spin on Comfort Food

    Imagine a crispy, bubbling layer of cheese and tomato sauce nestled over tender eggplant slices, but with a twist that sparks nostalgia in every bite. This version of eggplant Parmesan isn’t your typical bake—it’s inspired by street food stalls in Italy where bold flavors meet rustic charm. The secret? A drizzle of balsamic glaze that adds a sweet tang and enhances the smoky eggplant.

    In my kitchen, I love turning classic dishes upside down. Today’s recipe combines the deep, comforting flavors of traditional eggplant Parmesan with unexpected, vibrant accents. It’s perfect for cozy nights or when you want a dish that feels familiar but also exciting. The aroma alone makes the whole house smell like a bustling Italian pizzeria.

    WHY I LOVE THIS RECIPE?
    – It captures the essence of childhood dinners with a gourmet twist.
    – The crispy edges remind me of my grandma’s secret fried eggplant recipe.
    – The fresh basil and balsamic brighten up the rich, cheesy layers.
    – It’s versatile—great for a family meal or impressing guests.
    – Who doesn’t love gooey cheese melting over roasted vegetables?

    AVOID MY DISASTER (You’re Welcome)
    – FORGOT to drain excess moisture: Soggy eggplant is no fun—press slices well before cooking.
    – DUMPED too much oil in the pan: Caused splatters and greasy layers; use just enough to coat.
    – OVER-TORCHED the cheese: Turn the broiler off after golden or risk burnt bitterness.
    – FORGOT about the breading sticking: Double coat with flour for sturdy crust.

    QUICK FIXES THAT SAVE YOUR DAY
    – When the eggplant is soggy, sprinkle as much salt as needed, then pat dry aggressively.
    – Splash a little white wine vinegar over the cheese if it’s not browning fast enough.
    – Shield the dish with foil if cheese begins to burn before the sauce thickens.
    – Patch a soggy crust with a quick sprinkle of toasted breadcrumbs.
    – When in doubt, add a dash of hot sauce for a spicy kick and craveability.

    This dish feels especially meaningful now, as comfort foods get a modern upgrade. It balances nostalgia with fresh flavors that make dinner feel special without too much fuss. Plus, the slight char and melty cheese bring a warm, inviting aroma that fills the kitchen.

    The simplicity of roasting eggplant and layering it with vibrant sauces makes this recipe approachable yet impressive. It’s a fantastic way to enjoy veggies while indulging in gooey cheese and crispy textures. Perfect for those cozy nights when you crave something familiar but with a surprise in every bite.

    Eggplant Parmesan with Balsamic Glaze

    This dish features tender eggplant slices coated in seasoned breading, layered with rich tomato sauce and melted cheese, then topped with a drizzle of balsamic glaze. The final appearance is crispy-edged, bubbling cheese, and a glossy finish from the sweet-tangy glaze, creating a visually appealing and flavorful vegetarian main course.
    Prep Time 30 minutes
    Cook Time 40 minutes
    Total Time 1 hour 10 minutes
    Servings: 4
    Course: Main Course
    Cuisine: Italian
    Calories: 420

    Ingredients
      

    • 2 medium eggplant sliced into 1/4 inch rounds
    • 1 cup all-purpose flour for breading
    • 2 large eggs beaten, for coating
    • 1 cup bread crumbs preferably seasoned
    • 2 cups tomato sauce rich and flavorful
    • 1 1/2 cups shredded mozzarella cheese for layering
    • 1/4 cup fresh basil chopped, for garnish
    • 2 tbsp balsamic glaze for drizzling
    • to taste salt and pepper for seasoning
    • 2 tbsp olive oil for frying

    Equipment

    • Baking Sheet
    • Cooking pan

    Method
     

    1. Lay the sliced eggplant on a paper towel and sprinkle generously with salt. Let sit for 15 minutes to draw out excess moisture, then pat dry thoroughly.
    2. Set up a breading station with three shallow dishes: one with flour, one with beaten eggs, and one with seasoned bread crumbs.
    3. Dip each eggplant slice first into the flour, then into the beaten eggs, and finally coat evenly with bread crumbs, pressing gently to adhere.
    4. Heat olive oil in a large pan over medium heat until shimmering. Fry the breaded eggplant slices in batches for about 2-3 minutes per side until golden and crispy. Transfer to a paper towel-lined plate to drain.
    5. Preheat your oven to 375°F (190°C). Spread a thin layer of tomato sauce on the bottom of a baking dish.
    6. Arrange a layer of fried eggplant slices over the sauce, then spoon more tomato sauce on top and sprinkle with shredded mozzarella. Repeat layers until all ingredients are used, finishing with a cheese layer on top.
    7. Bake in the preheated oven for 25-30 minutes, until the cheese is bubbly and golden brown around the edges.
    8. Remove from oven and let rest for 5 minutes. Drizzle balsamic glaze over the top for a sweet tangy finish.
    9. Garnish with chopped fresh basil, then serve hot directly from the dish, enjoying the crispy edges, melted cheese, and flavorful layers.

    Notes

    Ensure eggplant is well drained to prevent sogginess. For extra crispiness, double coat slices with flour and bread crumbs. Adjust baking time for crispness preference.
    This eggplant Parmesan is more than just a meal; it’s a small celebration of flavors that come together effortlessly. Every bite offers a perfect balance of crispy, cheesy, and savory. It’s a reminder that comfort food can still surprise us with subtle twists.

    As the season shifts, dishes like this become even more appealing—warm, filling, and full of vibrant flavors. Making it at home feels comforting and empowering, especially when the kitchen fills with the scent of roasted garlic and melting cheese. Occasionally, your favorite recipes deserve a little playful remix.

  • Spooky Grits & Gummy Worms: Halloween Dirt Cake Secrets

    Spooky Grits & Gummy Worms: Halloween Dirt Cake Secrets

    As a food blogger obsessed with nostalgic twists, I love exploring the surprising textures and tales behind our favorite childhood treats. Halloween is the perfect time to revamp classic desserts with a dash of chaos—and what better way than with a dirt cake topped with squirmy gummy worms? This dessert is not just sweet; it’s a playful adventure for the senses.

    The smell of rich chocolate mingling with crunchy cookie debris instantly transports me to fond Halloween memories. Layered with creamy pudding and hidden beneath a messy coat of crushed cookies, each bite offers a satisfying crunch before melting into smooth richness. The gummy worms peek out like tiny, edible surprises—best enjoyed with a mischievous grin.

    Halloween Dirt Cake with Gummy Worms

    This no-bake dessert combines layered chocolate pudding and crushed cookies to create a textured, soil-like appearance. Topped with gummy worms that peek out, it offers a crunchy, creamy, and playful treat with a messy, earthy look. The final result is a visually fun and flavor-rich dessert perfect for Halloween gatherings.
    Prep Time 20 minutes
    Total Time 20 minutes
    Servings: 8
    Course: Main Course
    Cuisine: American
    Calories: 350

    Ingredients
      

    • 1 package chocolate pudding mix instant, to be prepared with milk
    • 2 cups cold milk
    • 1 package random cookie crumbs Oreo cookies or chocolate wafers, crushed
    • 1 cup graham cracker crumbs
    • Gummy worms gummy worms for topping and decoration

    Equipment

    • Mixing bowls
    • Whisk
    • Measuring cups and spoons
    • Food processor or plastic bag and rolling pin
    • Serving dish or individual cups

    Method
     

    1. Pour the instant chocolate pudding mix into a mixing bowl. Add cold milk and whisk until the pudding is thick and smooth, about 2 minutes. This creates a rich, creamy base for your dirt dessert.
    2. Transfer the prepared pudding to the refrigerator and let it chill for about 10 minutes to thicken further.
    3. While the pudding chills, take your cookie crumbs and graham cracker crumbs. If using whole cookies, place them in a plastic bag and crush with a rolling pin until you have fine crumbs that resemble soil.
    4. Once the pudding is set and thick, gently fold in half of the cookie and graham cracker crumbs to add texture and earthy color to the mixture.
    5. Spoon the pudding mixture into a serving dish or individual cups, smoothing the top with a spatula or the back of a spoon.
    6. Sprinkle the remaining cookie and graham cracker crumbs over the top to resemble dirt and create a layered, textured appearance.
    7. Decorate the surface with gummy worms, inserting some partially into the crumbs to give the look of squirmy creatures hiding beneath the soil.
    8. Let the assembled dirt cake sit in the refrigerator for at least 30 minutes before serving to allow the flavors to meld and the texture to firm up.
    9. Once chilled, serve the dirt cake with gummy worms peeking out and enjoy the playful, crunchy, and creamy layers.
    This dirt cake isn’t just about the fun visuals; it’s about how it transforms simple ingredients into a moment of joy and chaos. Perfect for Halloween parties or a spooky family treat, it brings out the kid in all of us.

    Making it is quick, messy, and utterly satisfying, especially when those gummy worms wiggle with every spoonful. As the seasons shift and the nights grow longer, this dessert becomes a sweet reminder that sometimes, a little chaos is exactly what we need to celebrate. Happy haunting and indulging!

  • A Rustic Twist on Peach Crisp with an Unexpected Spice

    A Rustic Twist on Peach Crisp with an Unexpected Spice

    Imagine biting into a warm, bubbling peach crisp where the fruit is perfectly tender, and the topping is golden and crispy. Today, I want to share a version that celebrates the fleeting peak of peach season by adding a hint of surprise—an unexpected touch of fiery ginger that awakens the senses. The aroma alone, a blend of sweet peaches and spicy heat, makes the entire kitchen feel like a summer festival.

    This recipe is more than just a dessert; it’s a nostalgic nod to lazy afternoons in sunlight and the irresistible allure of fresh fruit. It’s an easy way to elevate simple ingredients into something memorable, especially when peaches reach their juicy, fragrant prime. Plus, it’s a fantastic way to bring friends together, confident in the comfort of a classic with a lively twist.

    ## WHY I LOVE THIS RECIPE?
    – It balances sweet and spicy, creating a flavor that’s both familiar and exciting.
    – Perfect for late summer gatherings with friends, laughter, and lingering smells of caramelized fruit.
    – It’s forgiving and adaptable, forgiving accidental overcooking with a quick sprinkle of extra peaches.
    – Reminds me of childhood summers, yet feels fresh enough for dinner parties.
    – The aroma alone sparks joy and makes even the simplest night feel special.

    ## AVOID MY DISASTER (You’re Welcome)
    – FORGOT to drain the peach syrup and ended up with a runny topping. I added a touch more oats and flour to firm it up.
    – DUMPED in too much sugar on the fruit once, which made it cloying. I balanced it with a squeeze of lemon juice.
    – OVER-TORCHED the topping once when distracted. I lowered the oven temp and kept a close eye for the next batch.
    – MISSED adding the ginger due to rushing. A quick sprinkle just before baking saved the flavor.

    ## QUICK FIXES THAT SAVE YOUR DAY
    – When the topping is too soft, sprinkle with extra oats and bake 5 more minutes.
    – Splash lemon juice on overly sweet peaches to brighten their flavor.
    – Patch overly burnt topping with a fresh layer of crumbs and bake briefly.
    – Shield your peaches from drying out by covering with foil during the last 10 minutes.
    – When in streaks of chaos, keep some extra peach slices on hand to fill in gaps or cover imperfections.

    This peach crisp isn’t just a treat; it’s a conversation starter. The combination of sweet, spicy, and crispy elements echoes the joys of summer while offering a dash of daring that keeps everyone guessing. It’s the kind of dessert that feels just a little rebellious, yet wonderfully grounded in tradition.

    Crafted with seasonal peaches and a touch of fiery ginger, it’s a reminder to embrace the imperfect and savor each bite. Whether it’s a quiet night or a lively table, this dish invites warmth and spontaneity into every scoop and crumble.

    Peach Ginger Crisp

    This peach ginger crisp features tender, juicy peaches topped with a golden, crispy crumble infused with fiery ginger. The dish combines baking methods to create a bubbling fruit filling and a crunchy topping, resulting in a warm dessert with contrasting textures. Its vibrant aroma and caramelized appearance make it an inviting addition to late summer gatherings.
    Prep Time 15 minutes
    Cook Time 40 minutes
    Total Time 55 minutes
    Servings: 4
    Course: Main Course
    Cuisine: American
    Calories: 250

    Ingredients
      

    • 4 cups peach slices preferably ripe and juicy
    • 1 tablespoon fresh ginger finely grated
    • 1/4 cup sugar preferably organic or raw
    • 1 teaspoon lemon juice freshly squeezed
    • 1 cup rolled oats lightly toasted
    • 1/2 cup all-purpose flour
    • 1/2 cup unsalted butter cold and cubed
    • 1/4 cup brown sugar

    Equipment

    • Mixing bowls
    • Baking dish
    • Knife
    • Peeler or fruit slicer
    • Measuring cups and spoons
    • Oven

    Method
     

    1. Preheat your oven to 375°F (190°C) and lightly grease a baking dish.
    2. Peel and slice the peaches into thin, even pieces, then place them in a mixing bowl.
    3. Add finely grated fresh ginger, sugar, and lemon juice to the peaches, then gently toss everything together until the fruit is coated and fragrant.
    4. Pour the coated peaches into your prepared baking dish, spreading them out evenly.
    5. In a separate mixing bowl, combine rolled oats, flour, brown sugar, and cold, cubed butter.
    6. Use your fingers or a pastry cutter to rub the butter into the dry ingredients until the mixture resembles coarse crumbs.
    7. Sprinkle the crumble evenly over the peaches, covering the fruit completely with a golden, textured layer.
    8. Bake in the preheated oven for about 40 minutes, or until the topping is crisp and golden, and the peach filling is bubbling around the edges.
    9. Remove from the oven and let sit for a few minutes so the filling can thicken slightly.
    10. Serve warm, optionally with a scoop of vanilla ice cream or a dollop of whipped cream for extra indulgence.
    As the oven cools, the lingering fragrance of caramelized peaches and toasted oats can bring a comforting glance back to the day’s adventures. This recipe isn’t about perfection but about creating a memorable moment, one spoonful at a time.

    Enjoy this twist on a classic while peaches are at their peak. It’s perfect for making with what you have on hand and sharing with the people you hold dear. Sometimes, the simplest desserts can become the most cherished memories.